
Hi there!!!

AND I happen to be super excited about this particular post. There's just something about this project that makes me smile! Tell me if it doesn't do that to you, too!
For a little back story, I'll start by saying I love the month of June for many reasons most especially as
it’s the month that my middle son was born. His birthday is always right
around Father’s Day so I jokingly tell my husband that since he already got the
best present I could give, there’s no need for anything else! Of course I don’t really mean that as my
husband really is one of the most hands-on, involved dads I know. He does so
much with our boys, loves that he gets to and as such totally deserves to be
celebrated.
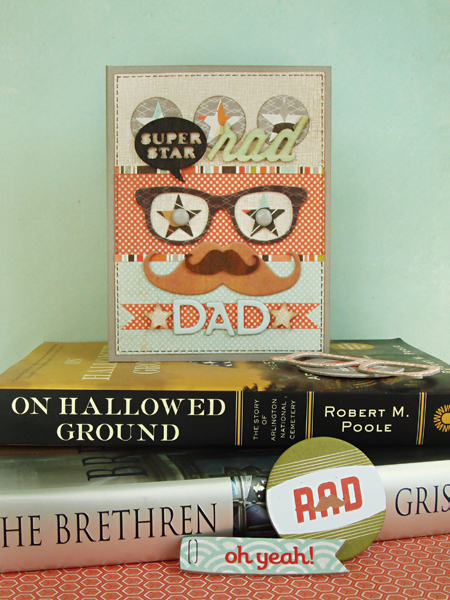
So for this month’s ONBC, I thought I’d do just that and make
him an extra special Father’s Day card. The "special" will be the surprise element of a gift card holder perfect for tucking in a little extra
something on his special day!
Supply
List: BasicGrey Hipster PP, brads, chipboard shapes, wood veneers, chipboard
alpha; Studio Calico wood veneer; Core’dinations cardstock’ Fiskars star
punches; EK Success circle punch; Colorbox chalk ink; Hero Arts ink; Stampin’
Up! ink; Zig pen; Scrapbook Adhesives by 3L.
Now here's how it broke down this month:

OLD: These
ancient but sturdy circle punches. I think they were the first punches I ever
bought. They don’t look pretty anymore, but they sure do the job and I love
them for that! And then of course my Fiskars star punches. While not as old,
they are still a staple of my scrappy arsenal, especially being the mom of
boys!
NEW: The
gorgeous BasicGrey HIPSTER line! You can’t get more masculine than this line
and it’s so groovy with its retro hip vibe! LOVE LOVE LOVE it! (See above
reference to ‘mom of boys.’)
BORROWED:
I snagged this fun gift card holder-making technique from my talented friend
Kimber McGray’s book 175 Fresh Card Ideas. I have had the pleasure of
working with Kimber on a couple of her books and I always credit her with the
fact that I make cards at all! The book is uber-inspiring and full of fun tips
and tricks just like this one I’m going to share with you today!
COOL: That super-fun, retro rad gift card holder just waiting to give to Dad for Father’s
Day!
Here's how you can make one of your own for that special Dad in your life:
I like standard card sizes so this will fit into your A2 envies with ease and make a 4.25”x5.5”
gift card holder.
You will need:
Cardstock
Scoring
board
1.5”
circle punch
Craft
knife
Adhesive
Tape
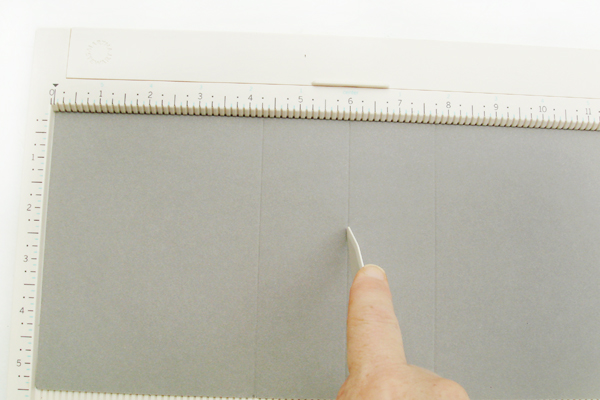
Trim piece of cardstock to
12”x5.5”. Score at 4.25”, 6” and 7.75” mark.
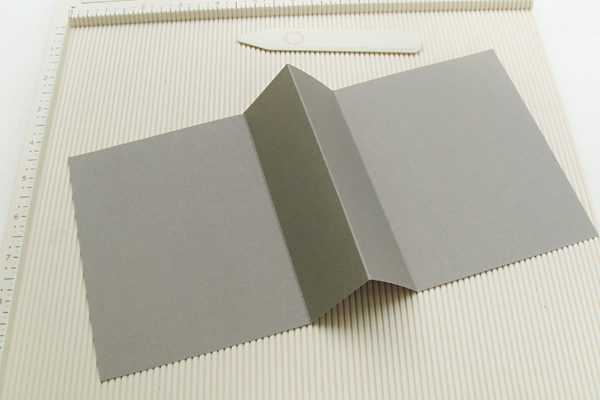
Fold
cardstock as shown along the scored lines.
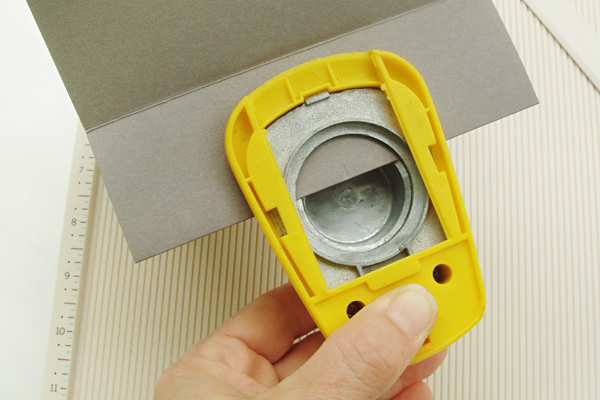
Holding
the center fold together, punch a half circle from the center of the fold using
the 1.5” circle punch.

Open
the card back up and cut as shown along the center fold to create enough room
to slide in a gift card.

Apply
strong tape adhesive along the three sides of the center fold as shown (making
sure to leave the area containing the circle free). Seal the fold up so it can
securely hold the gift card.

And all
that’s left is inserting the gift card!
There you have it! Easy, right?! I hope my husband loves the card as much as I do come Father's Day. (I'm trying to save it but it's hard for me to keep it secret - well...as secret as between you, me and the internet!)
As for me, I'll be holding a yard sale a good part of this weekend. Wish me luck and good weather!
Have an amazing weekend!
xoxo,
Have an amazing weekend!
xoxo,
k
No comments:
Post a Comment